It’s high time for pie time—and I don’t just mean any pie. I’m talkin’ the kind of pie that makes you want to loosen your belt, grab a fork, and dig in before it’s even cooled off. You know what I’m talking about, right? That sweet, golden moment when the scent of buttery crust and bubbling fruit or creamy filling wafts through the house. Whether it’s Thanksgiving or a random Tuesday, pies have a way of turning the ordinary into a slice of celebration.
The phrase “it’s high time for pie time” isn’t just a catchy little rhyme—it’s a call to action. Around here, pie isn’t just dessert. It’s therapy, tradition, and a whole lotta love packed into a flaky crust. Growing up, pie was the answer to just about everything in our house. Got a new job? Bake a pie. Feeling blue? Warm up an apple pie. Need to say sorry, celebrate, or just pass the time? Yep—pie again.
And if you’ve ever felt nervous about making one from scratch, trust me—you’re not alone. Pie baking can feel intimidating, like a sacred Southern ritual passed down through generations. But today, we’re throwing open the kitchen doors, dusting off the rolling pins, and diving right in. I’ll guide you through each step, spill a few family secrets, and share the kinds of tips that only come from years of rolling, crimping, and sometimes crying over a soggy bottom crust.
So grab your apron, preheat that oven, and let’s make some pie magic happen. Because honestly, if there’s ever been a better time to bake a pie… I sure haven’t found it.
Table of contents
- It’s High Time for Pie Time: Essential Ingredients and Must-Have Tools
- It’s High Time for Pie Time: Step-by-Step Pie Baking for Foolproof Results
- It’s High Time for Pie Time: Helpful Tips and Pro-Level Insights
- Tip #1: Butter is Your Best Friend—But Don’t Overdo It
- Tip #2: Don’t Skip the Chill—Twice
- Tip #3: Use a Glass Pie Plate for Peace of Mind
- Tip #4: Vent That Pie Like a Pro
- Tip #5: Keep an Eye on Sugar
- Tip #6: Egg Wash is the Cherry on Top (Even Without Cherries)
- Tip #7: The Waiting Is the Hardest Part (But It’s Worth It)
- Tip #8: Practice Makes Perfect (and Tasty Mistakes Are Still Delicious)
- Frequently Asked Questions
- Related Content Recommendations
- Final Thoughts
It’s High Time for Pie Time: Essential Ingredients and Must-Have Tools
Let’s be honest—pie baking is equal parts art and heart. You can’t just toss a few things into a pan and hope for the best. It all starts with the right ingredients, and having the right tools on hand is like having a trusty sidekick in your corner. So before we roll up our sleeves and get elbow-deep in flour, let’s talk pie essentials.
The Backbone of Every Pie: The Crust
The crust is the soul of any pie. You could have the most luscious filling in the world, but if your crust is tough or soggy? Game over.
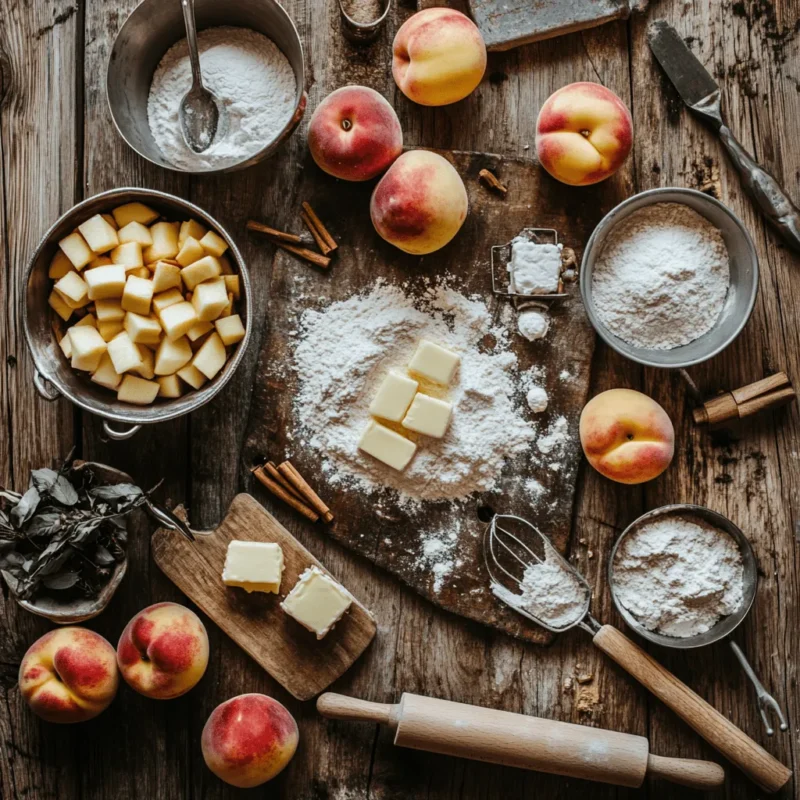
Here’s what you need for a perfect pie crust:
- All-purpose flour: Stick with unbleached if you can. It gives a better texture and flavor.
- Butter (or shortening, or both): Butter adds rich flavor, while shortening gives you that tender, flaky bite. I love a combo of both—grandma’s secret right there.
- Ice-cold water: No cheating here. Cold water helps keep the butter solid until it hits the oven. That’s where the magic happens.
- Salt: Just a pinch to balance flavors.
Pro Tip: Freeze your butter for about 10 minutes before cubing it. That little trick makes all the difference.
Filling the Love: Fresh, Flavorful Ingredients
Now, depending on what pie you’re making, your ingredients will shift. But some rules apply across the board.
- Fresh fruit over canned. Always. Whether it’s tart apples, juicy peaches, or plump blueberries, fresh fruit brings brightness and real flavor.
- Brown sugar or white? Use brown sugar for deeper, molasses-like flavor. Go with white sugar for lighter, cleaner sweetness.
- Cornstarch or flour for thickening? Cornstarch gives a clear, glossy finish, while flour is great for heartier, rustic pies.
- Warm spices: Cinnamon, nutmeg, ginger, allspice—don’t be shy. A teaspoon here, a dash there, and boom—flavor explosion.
Want a twist on traditional flavor? You could draw inspiration from the warm spice notes used in this Spanish Apple Pie (Empanada de Manzana), where cinnamon, lemon zest, and a touch of vanilla really bring out the fruit.
Tools That Make Life Easier (and Your Pie Better)
- Rolling pin: A good, heavy wooden one is gold. Chill it in the fridge for a half hour for bonus points.
- Pastry cutter: This handy little tool blends butter into flour like a dream.
- Pie dish: Glass is my go-to—it lets you peek at the bottom to make sure it’s browned and beautiful.
- Baking weights or dried beans: For blind baking that crust to golden perfection.
- Pastry brush: For brushing that glossy egg wash on top.
- Cooling rack: Because patience is part of pie greatness. (We’ll get to that later.)
Optional (But Delicious) Extras
- Vanilla extract – A splash brings everything together like a warm hug.
- Lemon zest – Especially in fruit pies, it brightens up the whole flavor profile.
- Butter pats on top – Yep. A few little cubes on top of your filling before it bakes can take your pie from good to unforgettable.
Pie baking doesn’t have to be complicated, but starting with the best ingredients and having the right tools on hand makes it a whole lot more fun—and a whole lot more delicious.
It’s High Time for Pie Time: Step-by-Step Pie Baking for Foolproof Results
Pie baking might look fancy, but I promise—once you understand the rhythm, it’s like muscle memory. Every great pie starts with a little patience, a pinch of planning, and a whole lotta love. So if you’ve ever found yourself staring down a bag of flour wondering “Where do I even begin?”, let me take you by the hand and walk you through it.
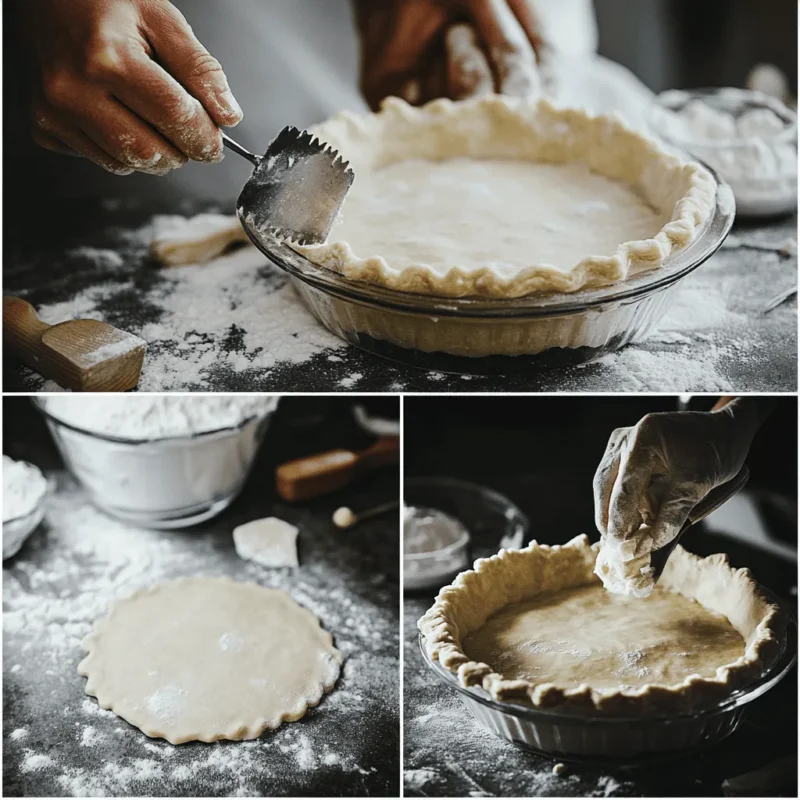
Step 1: Mastering the Crust (Don’t Skip This One!)
It’s high time for pie time, so we’re starting with the part most folks dread: the crust. But don’t worry—we’re not here to impress the pastry chefs of Paris. We’re here to make it buttery, flaky, and downright delicious.
- Start with cold everything. Your butter should be just shy of frozen, and even your flour benefits from a chill in the freezer. The cold is key to flaky layers.
- Use a pastry cutter or your fingers to blend the butter into the flour. You’re looking for pea-sized chunks—little buttery bits that will melt in the oven, creating steam pockets. That’s the flake factor.
- Add ice water one tablespoon at a time. The moment the dough starts to come together, stop. Overworking it is like tough love gone wrong—it’ll make the crust chewy instead of tender.
- Divide the dough in two, wrap in plastic, and chill for at least an hour. Yes, waiting stinks, but it’s the secret to a crust that rolls out smooth and bakes like a dream.
Troubleshooting Tip: If your dough is cracking when you roll it out, let it rest at room temp for 10 minutes. Too sticky? Dust with flour, but gently.
Step 2: Filling It Up Right
Once your crust is chilled, roll it out on a floured surface into a circle about 12 inches wide. Gently lay it into your pie plate and let it nestle in without stretching. That’s your bottom crust ready.
Now it’s time for the filling—this is where your creativity shines.
- Fruit pies: Toss fruit with sugar, a touch of flour or cornstarch, lemon juice, and spices. Let it sit for 10 minutes so it gets juicy.
- Custard or cream pies: Cook the filling on the stovetop first. Think chocolate, banana, coconut—smooth, silky textures.
- Savory pies (yes, they count too!): Use cooked meats and veggies, and thicken the filling with roux or cream.
Pile it in, and don’t be afraid to heap it high—fruit will shrink as it bakes. If you’re doing a top crust, now’s the time to place it, crimp the edges, and cut slits for steam.
Step 3: The Bake and Wait Game
Preheat your oven to 425°F (220°C). Here’s how to bake like a boss:
- Start hot, finish cool. Bake your pie at high heat for 15-20 minutes, then reduce to 375°F (190°C) for the rest of the bake. This helps set the crust and thicken the filling.
- Protect those edges. Use a pie shield or foil strips after the first 20 minutes so they don’t burn while the center catches up.
- Watch for bubbling. For fruit pies, look for juices bubbling out the vents—that means the filling’s fully cooked.
- Custard pies need a gentle jiggle. They should be set around the edges but slightly wobbly in the center.
Common Mistake to Avoid: Don’t underbake. A pale crust means a doughy bottom and sad, soupy slices.
Step 4: The (Agonizing) Cool Down
Here’s the part everyone tries to skip—but don’t. It’s high time for pie time, and that means waiting until your masterpiece sets properly.
- Fruit pies: Let cool at least 3 hours so the juices thicken.
- Custard or cream pies: Cool completely, then refrigerate for at least 4 hours (overnight is best).
- Savory pies: Cool 20–30 minutes before slicing to let it hold together.
Resist the urge. Slicing into a hot pie will break your heart—and your crust.
It’s High Time for Pie Time: Helpful Tips and Pro-Level Insights
It’s high time for pie time—and while the basics will get you by, it’s those little insider tricks that really elevate your pie from “pretty good” to “pass me another slice!” Over the years, I’ve baked my share of pies—some triumphant, some… well, let’s just say the dog enjoyed them. These are the hard-earned lessons, handed down from Southern kitchens and polished with personal trial and error.
Tip #1: Butter is Your Best Friend—But Don’t Overdo It
You might be tempted to throw in a little extra butter for good measure. Don’t. Too much fat can make your crust greasy instead of flaky. Stick to the recipe, and chill that butter well. The colder it is, the more steam it creates in the oven, and that’s where your layers come from.
Pro Insight: Try grating frozen butter with a cheese grater into your flour. It distributes more evenly and saves your arms the workout.
Tip #2: Don’t Skip the Chill—Twice
You chill the dough after mixing, yes. But you should also chill your assembled pie before baking. That extra 20–30 minutes in the fridge helps the crust hold its shape and prevents the butter from melting prematurely.
Bonus: A cold pie going into a hot oven equals better lift and flakier results.
Tip #3: Use a Glass Pie Plate for Peace of Mind
Want to know if your bottom crust is actually baked through? Glass lets you peek underneath without lifting or cutting. It’s a small switch that makes a huge difference—no more soggy surprises.
Pro Insight: Place your glass pie plate on a preheated baking sheet. It helps conduct heat from the bottom up, ensuring even baking.
Tip #4: Vent That Pie Like a Pro
If you’re baking a double-crust pie, make sure to cut a few generous slits in the top. These aren’t just pretty—they release steam so your filling thickens up without creating a soggy mess.
Design hack: Use a paring knife to create seasonal shapes or initials—looks fancy, takes two seconds.
Tip #5: Keep an Eye on Sugar
Sugar isn’t just about sweetness—it affects structure. Too much sugar can make fillings runny, and not enough can leave them dull. Always taste your fruit. If it’s super sweet already, dial the sugar back a little. If it’s tart, lean in.
Pro Tip: Add a tiny pinch of salt or a squirt of lemon juice to intensify fruit flavor without needing more sugar.
Tip #6: Egg Wash is the Cherry on Top (Even Without Cherries)
Brushing your crust with an egg wash before baking gives it that beautiful, bakery-style sheen. Want a little extra sparkle? Sprinkle coarse sugar over the top.
- For golden brown: One egg beaten with a tablespoon of milk.
- For darker shine: Just egg yolk with a splash of cream.
Tip #7: The Waiting Is the Hardest Part (But It’s Worth It)
Let me say it again—it’s high time for pie time only after your pie has cooled properly. Cutting too soon is the #1 mistake most people make. Hot fillings haven’t set yet, and you’ll end up with a lava flow instead of a slice.
If you’re in a rush? Stick the whole pie in the fridge after it cools slightly on the counter. Just don’t serve it hot. Please. I’m begging you.
Tip #8: Practice Makes Perfect (and Tasty Mistakes Are Still Delicious)
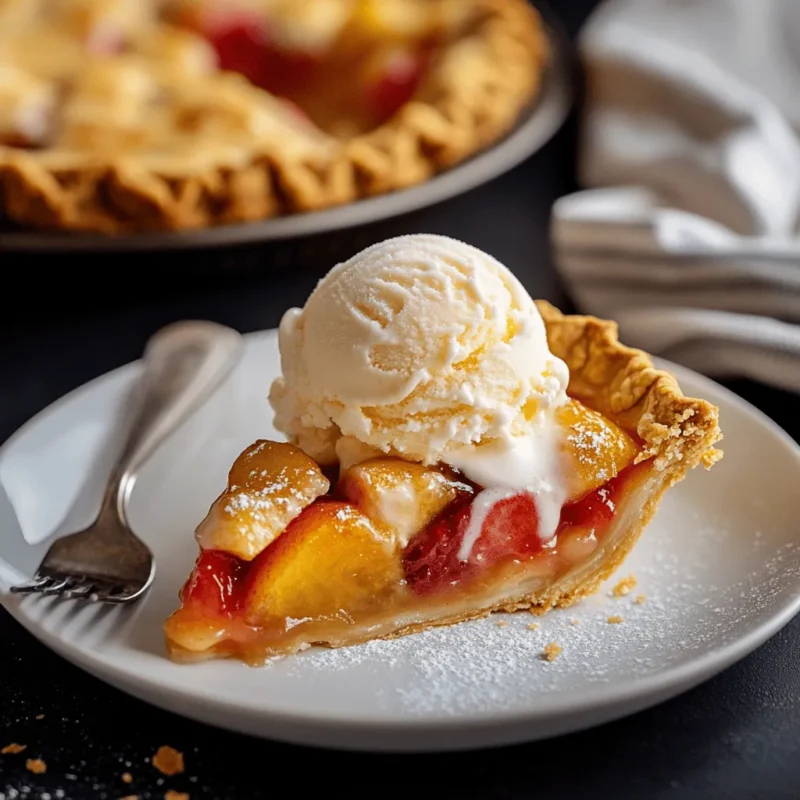
Here’s the truth: not every pie will be picture-perfect. Sometimes your crust will shrink, your filling might bubble over, or you’ll forget the sugar (yep, been there). But guess what? Pie is forgiving. Dress it with a scoop of ice cream and call it rustic.
Pro Insight: Keep a pie journal. Jot down what worked, what didn’t, and what you want to try next time. It’s like a diary, but tastier.
Frequently Asked Questions
You’ve pulled your masterpiece from the oven, and it’s golden, bubbling, and smelling like sweet heaven. But wait—it’s not ready for slicing just yet. The minimum cooling time for pies is at least 2 hours on a wire rack. For fruit pies, you want those juices to settle and thicken properly. Slice too soon, and you’re left with a puddle instead of a clean slice. Trust me: patience here is a virtue, not a punishment.
Most standard fruit pies bake at a starting temperature of 425°F (220°C) for the first 15-20 minutes. Then, reduce the oven to 375°F (190°C) and bake for another 35 to 45 minutes, depending on the filling and crust thickness. Cream or custard pies typically bake at a gentler 350°F (175°C) for about 40 to 50 minutes. Always check for doneness using visual cues—bubbling fruit, golden edges, and slightly puffed custards are your green lights.
If we’re talkin’ fruit pies, aim for 3–4 hours of cooling before serving. Cream pies? They need to chill in the fridge at least 4 hours, but overnight is best. Savory pies like pot pies or quiches should rest 20–30 minutes before cutting to hold their structure. Basically, if you can smell it and it’s calling your name, wait just a little longer—it’ll be worth it.
Here’s the deal: waiting for pie to cool isn’t just a suggestion—it’s a structural necessity. When pies cool, starches finish setting and juices gel. If you cut too early, you won’t get clean slices, and all your delicious filling will ooze out like lava. Plus, flavors deepen as they cool. That’s why leftover pie tastes even better the next day!
In terms of food safety, per USDA guidelines, hot foods should not remain at room temperature for more than 2 hours. But when it comes to pies, especially those without dairy or egg-based fillings, you can safely cool them on the counter for up to 4 hours. After that, pop them in the fridge. Cream and custard pies, however, should go into the fridge within 2 hours max.
Related Content Recommendations
Now that you’ve got flour on your apron and the scent of warm pie filling your kitchen, don’t stop here. Pie is just the beginning. Whether you’re looking to branch out into seasonal treats, savory crust creations, or sweet Southern staples, I’ve got more delicious rabbit holes for you to tumble down.
1. Southern Buttermilk Pie That’ll Melt in Your Mouth
Creamy, tangy, and kissed with just the right amount of sweetness, this old-fashioned beauty is a must-try if you’re dipping your toes into custard pies. It’s the kind of recipe that turns heads at potlucks and brings grannies to tears.
2. The Flakiest Homemade Biscuits (No Rolling Pin Needed!)
If mastering pie crust has you feeling empowered, these Southern biscuits are your next best kitchen adventure. They’re fast, forgiving, and so tender you might just cry a little when you bite into one warm from the oven.
3. How to Blind Bake a Pie Crust Without the Guesswork
If you’re making cream or custard pies, this guide walks you through blind baking like a pro—because no one likes a soggy bottom, and yes, we’re looking at you, underbaked quiche.
4. Easy Peach Cobbler with a Buttery, Golden Topping
Craving something fruity but don’t feel like fussing with a crust today? This cobbler’s got you covered. One bowl, one pan, and a whole lot of flavor.
5. From Dough to Glory: A Beginner’s Guide to Pastry Dough
This one’s for you if pie crust has ever made you sweat. It breaks down every step, from flour choice to butter ratio, and shows you how to roll, fold, and chill your way to flaky perfection.
Want something savory and Mediterranean-inspired instead? Try this Lemon Butter Salmon with Roasted Potatoes and Broccoli—a simple, wholesome dinner that still brings that homemade comfort.
Looking for healthy and bold flavors? This Mediterranean Salmon Recipe is full of vibrant herbs, garlic, and lemon that make it a perfect dinner pairing after dessert.
Final Thoughts
If there’s one thing I hope you take away from all this, it’s that pie isn’t just dessert—it’s an experience. It’s a love letter written in butter and flour, sealed with sugar, and delivered fresh from the oven. It doesn’t matter if your crust is a little lopsided or your filling bubbles over. What matters is the joy it brings—to your kitchen, your table, and your heart.
Because really, it is high time for pie time. Time to turn off the noise, roll out some dough, and create something that reminds us of simpler days and sweeter moments. Maybe it’s a slice of Spanish Apple Pie on a rainy afternoon. Maybe it’s a buttery pecan pie passed down through generations. Or maybe—just maybe—it’s the very first pie you’ve ever made, and it’s yours.
And that? That’s worth every ounce of flour on your counter.
Whether you’re baking for a holiday, a birthday, or no reason at all, remember: pie is meant to be shared. So go ahead—cut a slice, pass it around, and make some memories.
And when you do, you’ll know deep down…it really was high time for pie time.
🔗 P.S. Love what you see here? Save your favorite pies and recipes to our Pinterest page!

It’s High Time for Pie Time: How to Master Pie Baking Like a Southern Pro
Ingredients
For the Crust (Makes 2 crusts):
- 2 ½ cups all-purpose flour unbleached preferred
- 1 tsp salt
- 1 tbsp sugar optional for sweetness
- 1 cup 2 sticks unsalted butter, cold and cubed
- 6 –8 tbsp ice-cold water
For the Filling:
- 5 –6 cups fresh fruit apples, peaches, or berries
- ¾ cup sugar adjust to taste
- 2 –3 tbsp cornstarch or all-purpose flour for thickening
- 1 tbsp lemon juice
- 1 tsp ground cinnamon optional
- ¼ tsp nutmeg or allspice optional
- 1 tsp vanilla extract optional
- 2 tbsp butter cut into small pats for the top
For the Egg Wash:
- 1 egg
- 1 tbsp milk or cream
- Optional: coarse sugar for sprinkling
Instructions
Make the Crust:
- In a large bowl, whisk flour, salt, and sugar.
- Cut in cold butter with a pastry cutter or fingers until mixture resembles coarse crumbs.
- Gradually add ice water, mixing just until dough comes together.
- Divide in half, shape into discs, wrap in plastic, and chill for at least 1 hour.
Prepare the Filling:
- In a large bowl, toss sliced fruit with sugar, thickener, lemon juice, and spices.
- Let sit 10–15 minutes to draw out juices and blend flavors.
Assemble the Pie:
- Roll out one dough disc to fit a 9-inch pie plate. Transfer and press gently into the plate.
- Pour in fruit filling and dot with butter pats.
- Roll out second crust and place over filling. Trim, seal edges, and cut slits to vent.
Chill the Pie:
- Place assembled pie in the fridge for 20–30 minutes before baking.
Bake:
- Preheat oven to 425°F (220°C).
- Brush pie top with egg wash and sprinkle with coarse sugar if desired.
- Bake for 15–20 minutes, then reduce temperature to 375°F (190°C) and bake an additional 35–45 minutes.
- Cover edges with foil if browning too quickly.
- Pie is done when filling bubbles and crust is golden.
Cool:
- Let pie cool on a wire rack for at least 3 hours before slicing.
Notes
- Make-Ahead Tip: Crust dough can be made up to 3 days in advance or frozen for up to 3 months.
- Flavor Swap: Add a splash of almond extract to berry pies or orange zest to peach pies.
- Blind Baking: If using for a custard pie, pre-bake crust at 375°F for 20 minutes using pie weights.
Nutrition Facts (Per Slice)
- Calories: 410
-
Total Fat: 21g
- Saturated Fat: 13g
- Cholesterol: 55mg
- Sodium: 240mg
-
Total Carbohydrates: 55g
- Dietary Fiber: 3g
- Sugars: 22g
- Protein: 4g
1 thought on “It’s High Time for Pie Time: How to Master Pie Baking Like a Southern Pro”